Cold brew coffee is perfect for these summer days! It is a process of extracting ground coffee with either room temperature water or cold water for an extended period of time.
It is a different brewing method as opposed to iced coffee, where hot water is used in place to extract the coffee and chill with ice when served. The process is simple and fast but lacks finesse and delicacy as the coffee gets diluted over time.
If you like something robust without bitterness, less acidic and bold, cold brew coffee is definitely your best choice. You’ll get smooth, subtle and flavorful coffee just like those brewed with sophisticated cold drip brewer machines.
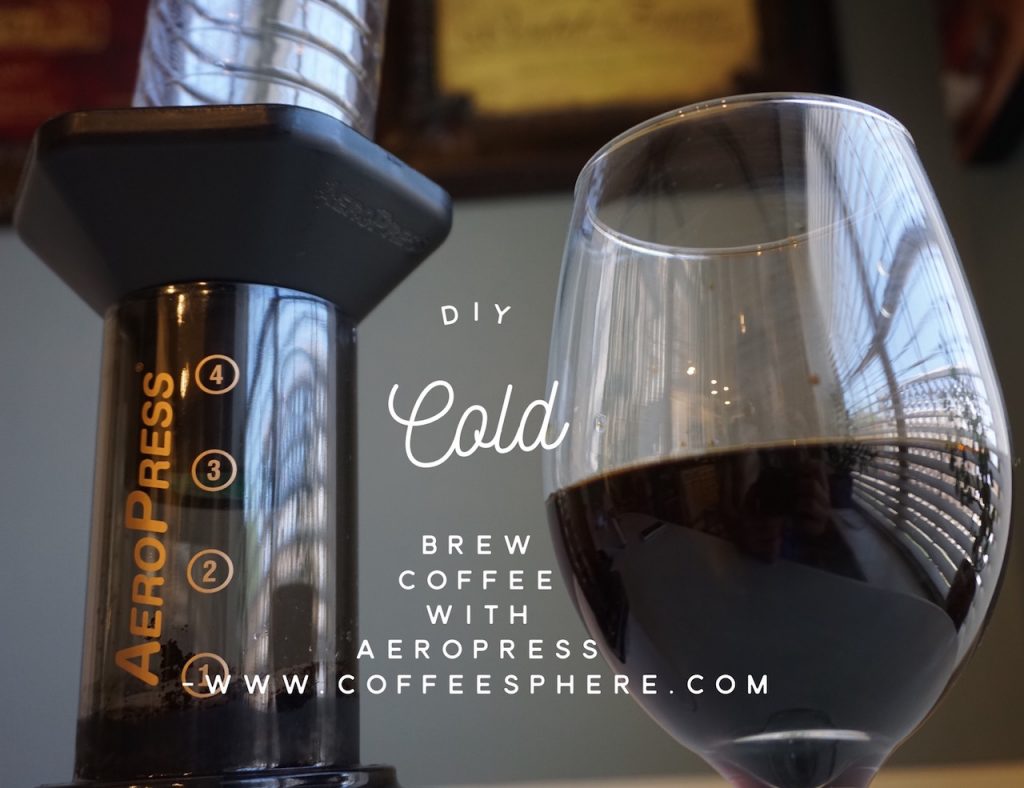
Cold brew coffee requires an expensive cold drip brewer. However, I am going to show you how to build your own cold drip brewer using an inexpensive Aeropress coffee and espresso maker.
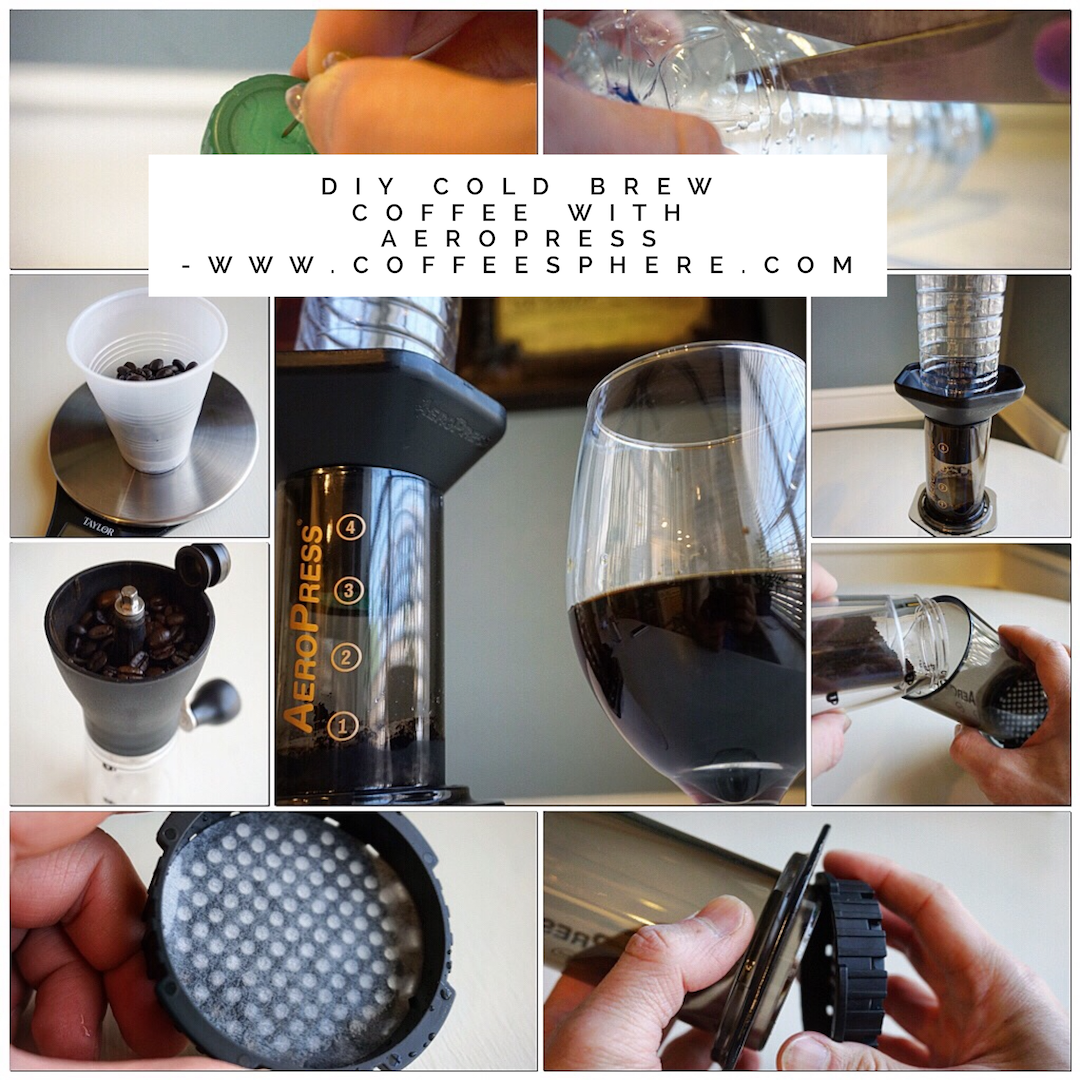
You will need the following:
• Aeropress maker
• 2 round filter papers
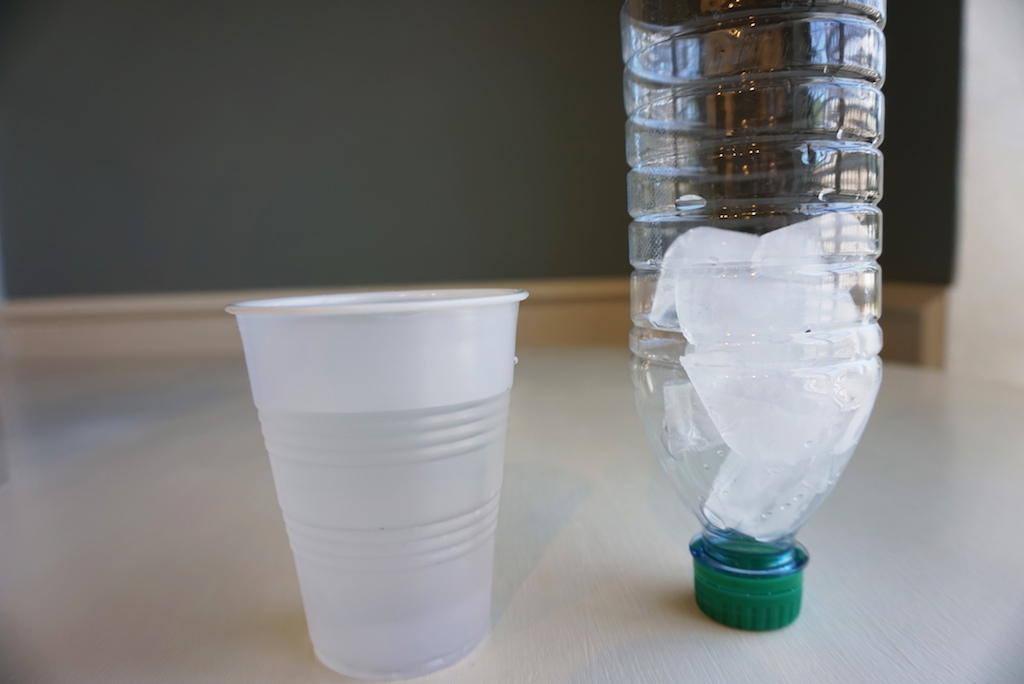
• Empty water bottle
• Sewing needle or push pin
• Coffee grinder (optional) – I recommend Hario Mini Grinder for its consistency in grinding small batch
• Kitchen scale – I recommend a digital scale with 0.1g increment
• A clear glassware
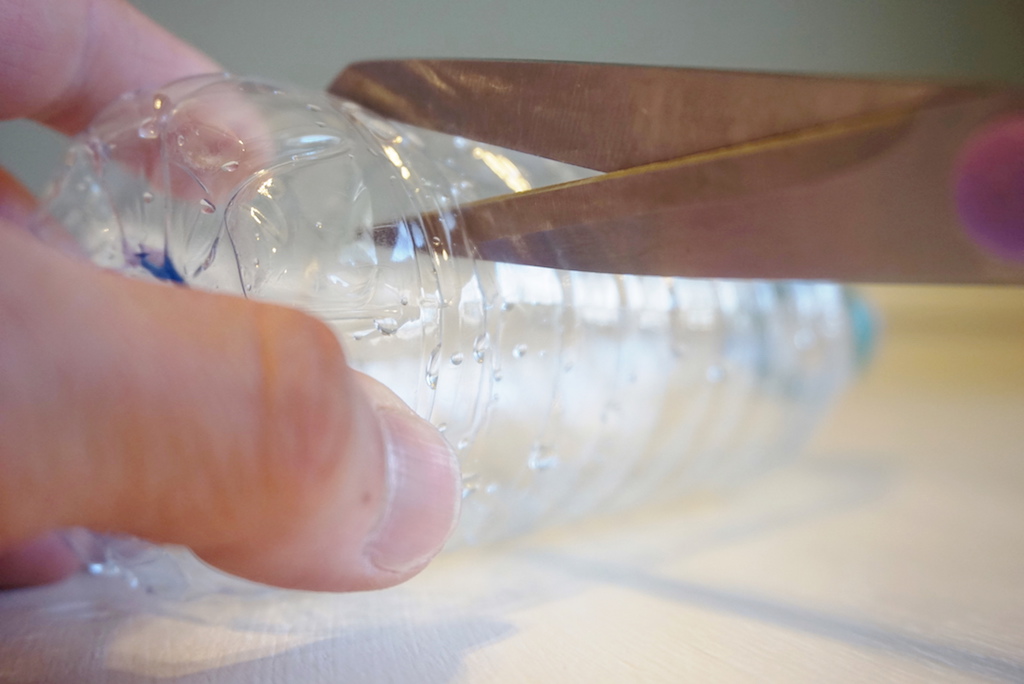
1. First of all, let’s make an ice chamber by cutting the bottom off of this water bottle with your scissors. Cut as close to the bottom as possible just in case you need to brew a bigger batch.
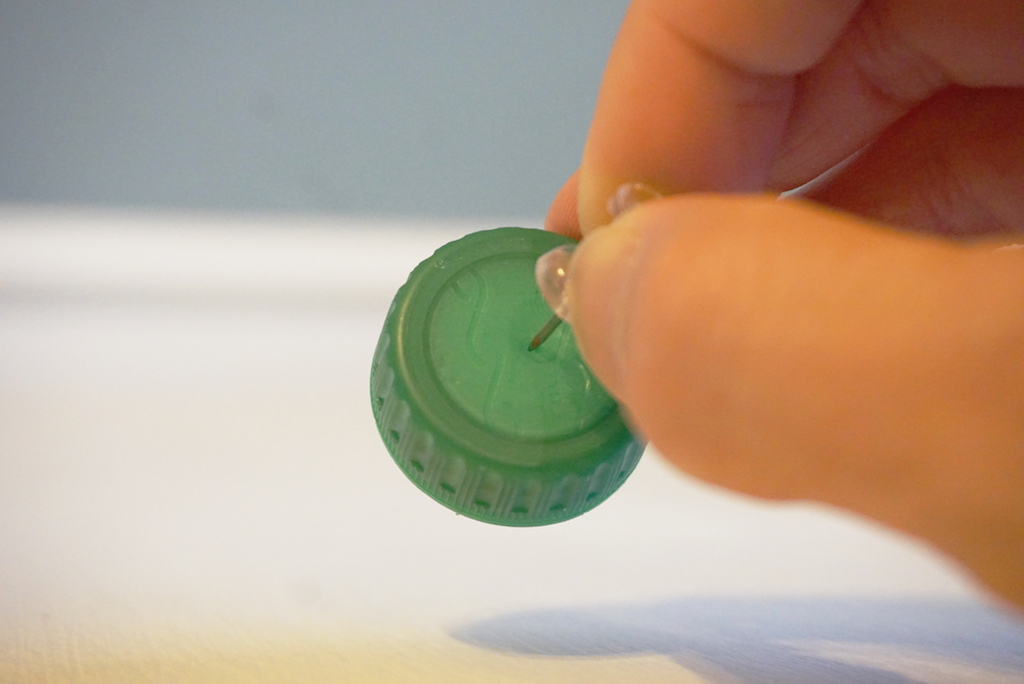
2. Puncture a hole in the middle of the cap. Always go small at first, and you can enlarge the dripping hole later on if required. Put the cap back and test your drip rate and aim for 30 drips per minute.
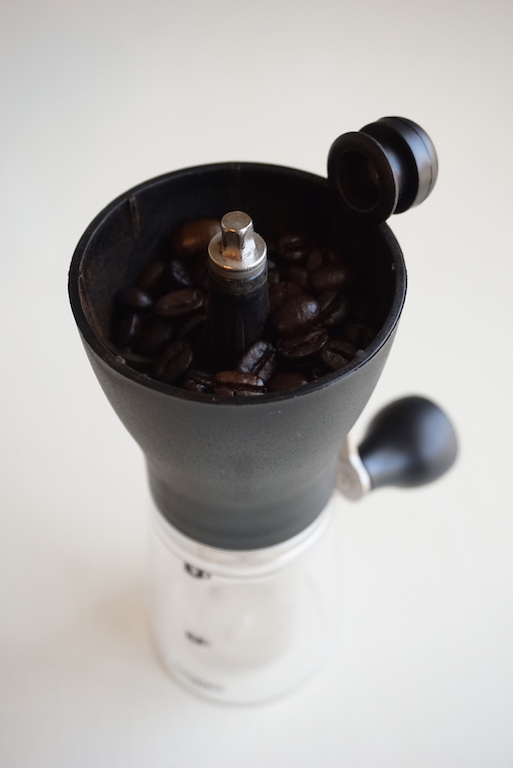
3. I chose darker roast coffee beans from Indonesia so I weighed 40g using a kitchen scale. Alter the dosage according to your liking.
4. I am using a manual burr grinder to achieve slight finer than medium grind for this setup. Again, alter your grind according to the coffee beans you are using as well as your personal taste.
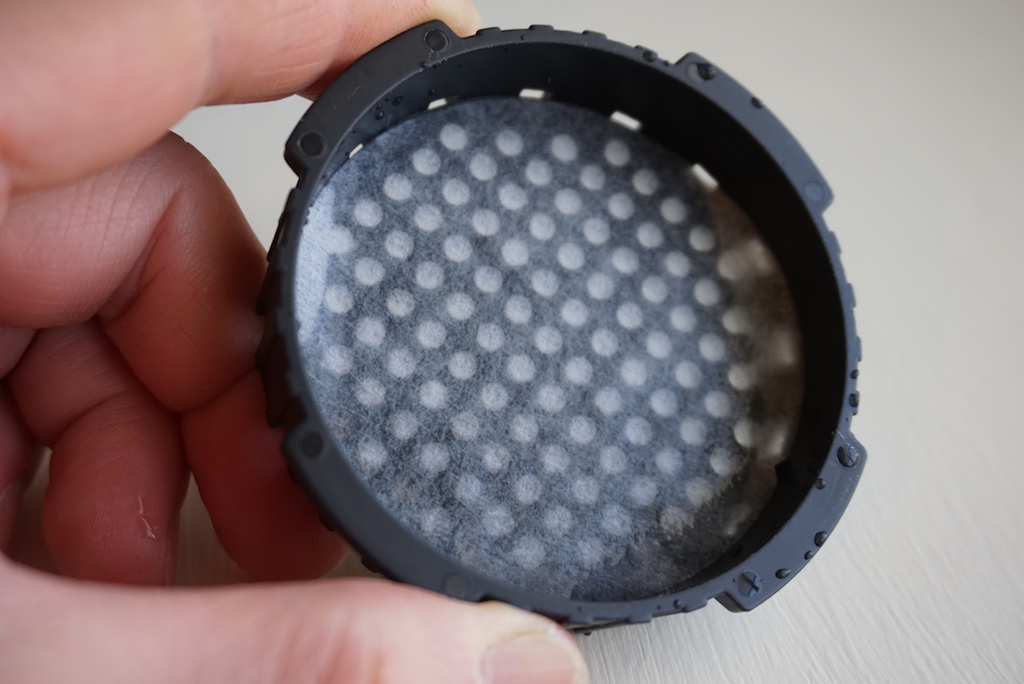
5. Set one of the filters in and wet it with cold water.
6. Lock the filter part into Aeropress. Do it carefully to prevent coffee ground from falling into your mug during the brewing process.
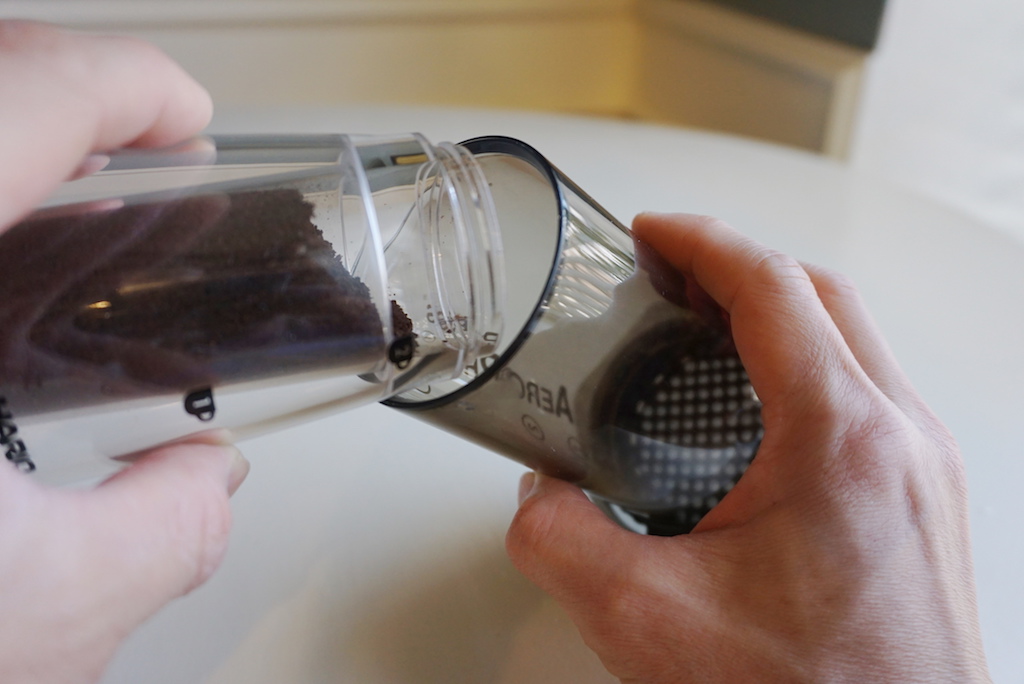
7.Pour the ground into Aeropress; gently tap on its side to level it out.
8. Gently pour 30g of cold water to the ground, and then put a dry filter paper on top. Press down slightly.
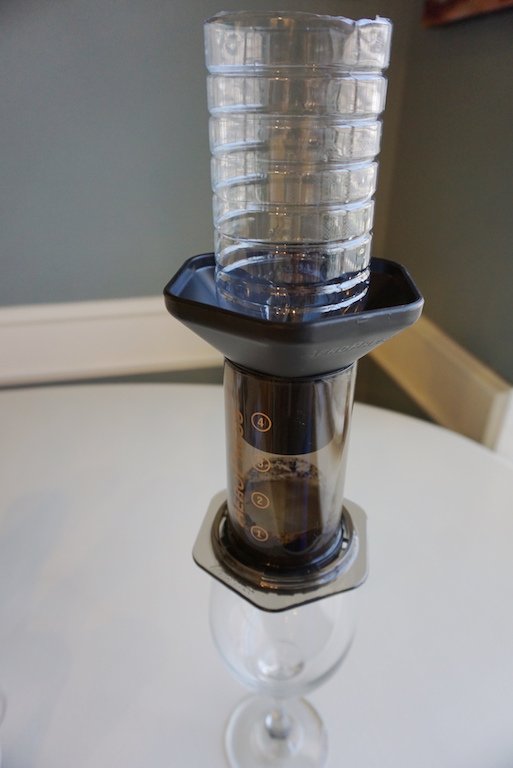
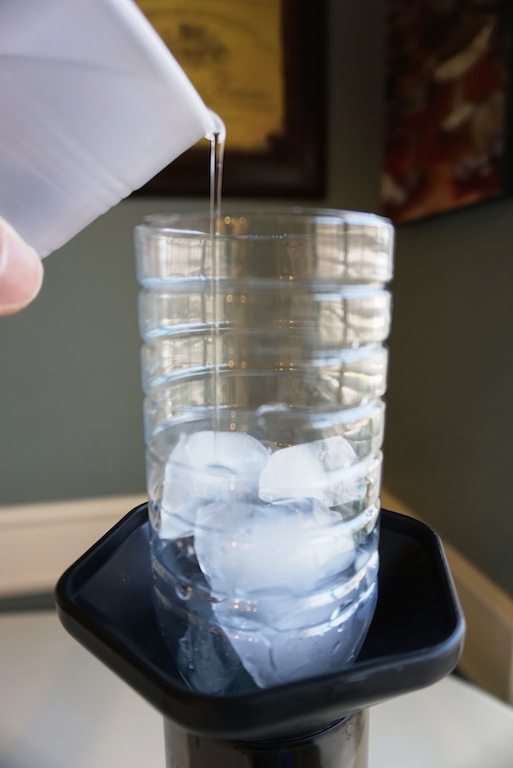
9. Mount your Aeropress on the glass, get ready to fill the chamber with ice and water.
10.Now it is time to measure your water and ice intake for your setup. The good old guideline is 300g of room temperature water and 200g of ice. However in my case, I simply use ½ cup of ice and ½ cup of water which makes up to roughly 450g of liquid in total.
11. Fill the chamber with measured ice and water and start the timer!
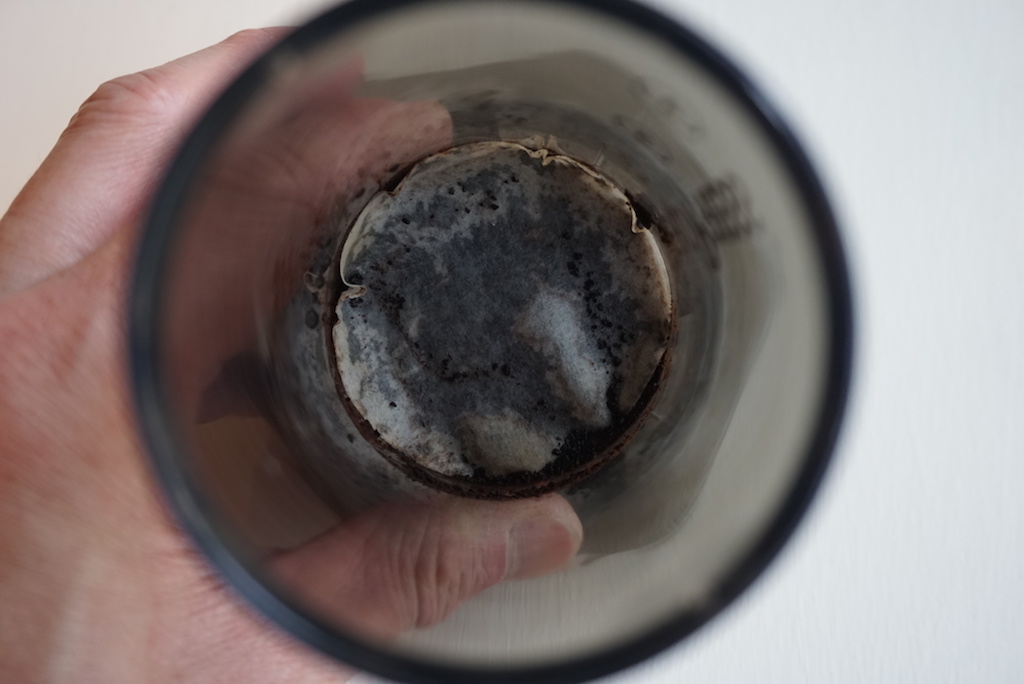
It will take 8-12 hours for the dripping process to be completed depending on your setup. I usually set it up during the night before bed and my cold brew will be ready the next morning.
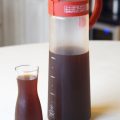
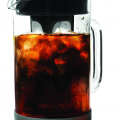
Viola! This is the result after 10 hours of continuous brewing. It is smooth, robust yet gentle. I especially like the long aftertaste that lingers in my mouth.
Cold brew is a slow process but the result is rewarding. It may sound like a science project but this is art to me. There is no right or wrong way of doing this, so enjoy the process, enjoy the art, enjoy the coffee!